Are you curious about why the Ryobi battery charger flashes red and green? In this article, we will uncover the reasons behind this peculiar behavior. Discover the possible causes and solutions to this issue, ensuring that your charging experience with the Ryobi battery charger is smooth and problem-free. So, let’s find out why the charger flashes those distinct red and green lights.
Overview of Ryobi Battery Charger
Introduction to Ryobi Battery Charger
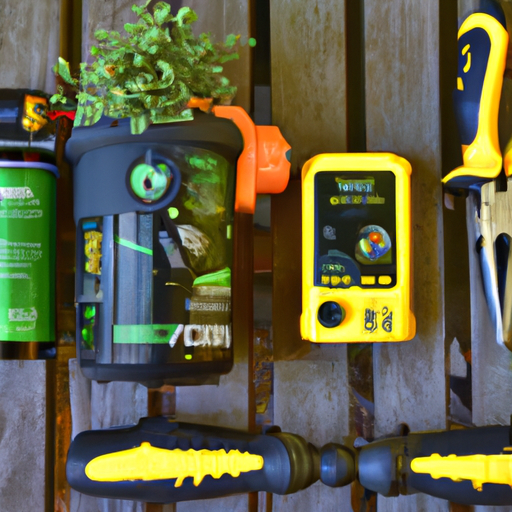
The Ryobi Battery Charger is a vital component of the Ryobi power tool system. It is designed to recharge the batteries used in Ryobi tools, ensuring you never run out of power during your projects. The charger is compact, user-friendly, and equipped with advanced features to make the charging process quick and efficient. Whether you are a professional tradesperson or a DIY enthusiast, understanding how the Ryobi Battery Charger works and troubleshooting any issues that may arise is essential to keep your tools running smoothly.
Features of Ryobi Battery Charger
The Ryobi Battery Charger boasts a range of impressive features that enhance its functionality and usability. One of the standout features is the dual-color LED lights that indicate the charging status of the battery. The charger also incorporates a charging protection system that prevents overcharging, overheating, and short-circuits, ensuring the longevity and safety of both the battery and the charger. Additionally, the Ryobi Battery Charger is compatible with various Ryobi batteries, making it versatile and convenient for users who own multiple Ryobi power tools.
Importance of Battery Charger for Ryobi Tools
The battery charger is an indispensable component for Ryobi tools because it allows users to recharge their batteries and keep their tools operational. Without a reliable battery charger, the performance and productivity of Ryobi tools would be severely affected. Being able to recharge batteries ensures that users can continue working without interruptions caused by running out of power. Therefore, understanding the functioning of the Ryobi Battery Charger and troubleshooting any issues that may occur is crucial in maintaining the efficient operation of your Ryobi tools.
Understanding the Flashing Red and Green Lights
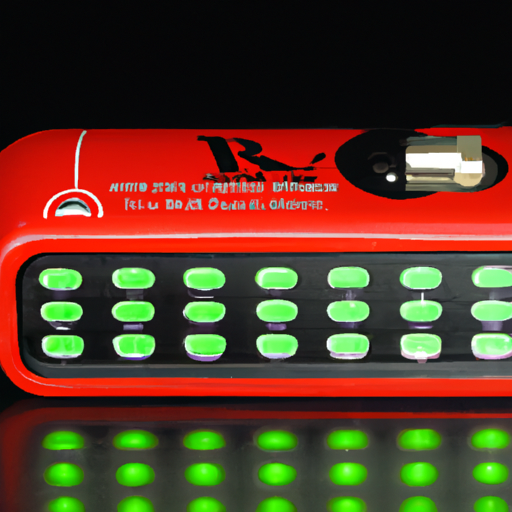
Explanation of Flashing Red and Green Lights
The flashing red and green lights on the Ryobi Battery Charger are important indicators that relay vital information about the charging process. While they may seem confusing at first, understanding their meanings can help you diagnose any potential issues and ensure that your batteries are charging optimally.
Indication of Battery Charging Status
The flashing red and green lights on the charger signify different stages of the battery charging process. Each pattern indicates a particular charging status, allowing you to monitor the progress. By understanding these indicators, you can determine whether the charging process is progressing normally or if there is an underlying issue that needs attention.
Possible Reasons for Flashing Red and Green Lights
Several factors can cause the flashing red and green lights on the Ryobi Battery Charger. Loose connections between the charger and the power source or the battery can disrupt the charging process and trigger the flashing lights. Additionally, a damaged charger or battery, improper battery condition, or even using a power source that is not suitable for the charger can result in the flashing lights. Understanding these potential causes will help you troubleshoot and resolve the issue.
Normal Charging Process
Step 1: Connecting the Charger to Power Source
To start the charging process, plug the Ryobi Battery Charger into a standard power outlet. Ensure that the power outlet is functional and the charger’s power cord is securely connected.
Step 2: Inserting the Ryobi Battery into the Charger
Take the Ryobi battery that needs to be charged and align it with the charging port on the charger. Insert the battery firmly, ensuring it is properly seated and making contact with the charging terminals.
Step 3: Charging Process Initiation
Once the battery is inserted correctly, the charger will detect it and automatically initiate the charging process. The flashing lights may begin at this stage, indicating that the battery is being charged.
Step 4: Charging Progress Indicators
While the battery is being charged, the flashing lights on the charger will relay important information about the progress. Pay attention to the flashing patterns to determine if the charging process is proceeding smoothly or if there are any issues that require troubleshooting.
Step 5: Full Battery Charge
Once the battery has reached its full charge, the flashing lights will stop, indicating that the charging process is complete. At this point, you can safely remove the fully charged battery from the charger and proceed with your tasks.
Troubleshooting the Flashing Red and Green Lights
Check for Loose Connections
If the red and green lights on the Ryobi Battery Charger are flashing, the first step is to ensure that all connections are secure. Check that the charger is properly plugged into a working power outlet and that the battery is correctly inserted into the charger. If any connections are loose, securely reattach them and observe if the flashing lights stop.
Ensure Proper Battery Condition
Another potential reason for flashing lights is an improperly conditioned battery. Ensure that the battery is not damaged or showing signs of wear. If the battery is old, it may need to be replaced. Additionally, a depleted or faulty battery may also cause the flashing lights. Try using a different Ryobi battery to see if the issue persists.
Inspect the Charger and Battery for Damage
Visual inspection of the charger and battery is essential in troubleshooting the flashing lights. Look for any visible damage or signs of wear, such as frayed wires or corrosion. If either the charger or the battery appears damaged, it may need to be repaired or replaced.
Clean the Battery Terminals
Dirty or corroded battery terminals can disrupt the charging process and cause the flashing lights. Use a clean cloth or cotton swab to carefully clean the terminals on both the battery and the charger. Ensure that there is no debris or dirt obstructing the charging connections.
Try Different Power Source
In some cases, using an incompatible or malfunctioning power source can trigger the flashing lights. Try plugging the charger into a different power outlet to rule out any issues with the initial power source. If the charging process proceeds normally with a different power source, then the original power outlet may need to be inspected or repaired.
Allow Sufficient Charging Time
It is important to note that the flashing lights may be a normal part of the charging process, indicating that the battery is correctly charging. In such cases, allow sufficient time for the charging process to complete before attempting any troubleshooting steps. Consult the user manual or product specifications to determine the typical charging time for your specific battery model.
Understanding Flashing Patterns
Different Flashing Patterns
The flashing patterns of the red and green lights on the Ryobi Battery Charger convey different meanings and information about the charging process. Each pattern corresponds to a specific charging status, enabling users to identify potential issues and address them accordingly.
Flashing Red Light Only
If only the red light on the charger is flashing, it indicates that the battery is deeply discharged or faulty. In such cases, it is recommended to check the battery’s condition and attempt to charge a different Ryobi battery to determine if the issue lies with the battery or the charger.
Flashing Green Light Only
When only the green light on the charger is flashing, it signifies a battery that is partially charged. The charging process is ongoing, and it is necessary to wait until the battery reaches its full charge before removing it from the charger.
Alternating Red and Green Flashing
An alternating flashing pattern of red and green lights indicates a fault in the charging process. This can indicate a problem with the charger or the battery. Try cleaning the battery terminals and ensuring secure connections. If the issue persists, professional assistance may be required.
Steady Red and Green Flashing
If both the red and green lights are steadily flashing, it suggests an issue with the charger itself. Check for any visible damage, loose connections, or signs of wear. If the problem persists, consider contacting Ryobi customer support or seeking professional assistance.
Specific Flashing Patterns and Their Meanings
It is crucial to consult the user manual or the Ryobi website for specific flashing patterns and their meanings corresponding to your specific charger model. Ryobi provides comprehensive documentation that outlines different flashing patterns and offers troubleshooting steps for each.
Common Issues and Solutions
Battery Not Charging
If your Ryobi battery fails to charge, there may be several underlying causes. First, check the battery’s condition and attempt to charge a different Ryobi battery to determine if the issue lies with the battery itself. Ensure all connections are secure, clean the battery terminals, and try using a different power source. If the problem persists, it may be necessary to replace the battery or consult a professional for further assistance.
Battery Overheating
Overheating batteries can pose a safety risk and may indicate a faulty charger or a damaged battery. If you notice excessive heat during the charging process, stop the charging immediately and disconnect the charger from the power source. Allow the battery to cool down before inspecting it for any visible damage. If the overheating issue persists, discontinue using the battery and consult a professional for guidance.
Faulty Charger
Occasionally, the issue may lie with the Ryobi Battery Charger itself. Inspect the charger for any visible damage or signs of wear, and ensure all connections are secure. If you believe the charger is faulty, discontinue its use and contact Ryobi customer support or visit an authorized service center for further assistance.
Battery or Charger Compatibility
Using incompatible batteries or chargers can lead to issues such as flashing lights or inadequate charging. Always ensure that you are using genuine Ryobi batteries and chargers that are specifically designed for your Ryobi tools. Using non-compatible accessories can damage the battery or the charger and may void any warranties.
Defective Battery
In rare cases, a defective battery may be the cause of the flashing lights. If you suspect your Ryobi battery is defective, contact Ryobi customer support or visit an authorized service center for guidance. They will be able to assess the battery and provide appropriate solutions.
Battery Age and Performance
Batteries have a limited lifespan and performance capacity. If you find that your battery no longer holds a charge effectively or fails to charge at all, it may be nearing the end of its lifespan. Over time, batteries naturally degrade, and their overall performance diminishes. If this is the case, consider replacing the battery with a new one to ensure optimum performance.
Need for Professional Assistance
When to Seek Professional Help
While many issues with the Ryobi Battery Charger can be resolved through troubleshooting, there are instances where professional assistance may be necessary. If you have followed all the recommended troubleshooting steps and the issue persists, it is advisable to contact Ryobi customer support or visit an authorized service center. These professionals have the expertise and resources to diagnose and resolve complex charging issues effectively.
Authorized Service Centers
Ryobi maintains a network of authorized service centers that specialize in repairing and maintaining Ryobi power tools and accessories. These centers employ trained technicians who are well-versed in the intricacies of Ryobi products. Contacting an authorized service center ensures that your Ryobi Battery Charger will be serviced by qualified professionals, guaranteeing reliable repairs and maintenance.
Contacting Ryobi Customer Support
Ryobi provides comprehensive customer support through various channels. If you require assistance or have unresolved issues with your Ryobi Battery Charger, reach out to Ryobi customer support via phone, email, or their online support portal. Their knowledgeable representatives will be able to provide guidance and support to address your concerns effectively.
Preventing Flashing Red and Green Lights
Regular Maintenance of Battery and Charger
Regular maintenance of both the battery and the charger is crucial to prevent issues that may lead to flashing red and green lights. Clean the battery terminals regularly, ensuring they are free from dirt and corrosion. Inspect the charger for any visible damage and clean it if necessary. By keeping both the battery and charger in good condition, you can minimize the risk of charging failures or irregularities.
Storing Battery in Recommended Conditions
Proper storage of Ryobi batteries is essential to maintain their performance and prevent potential issues during the charging process. Store batteries in a cool, dry place, away from extreme temperatures and direct sunlight. Avoid exposing them to moisture or harsh environments that may damage the battery. Storing batteries in recommended conditions will help extend their lifespan and ensure reliable charging.
Using Genuine Ryobi Batteries and Chargers
To avoid compatibility issues and potential charging problems, always use genuine Ryobi batteries and chargers. Never use aftermarket or non-compatible accessories, as they may damage both the battery and the charger. Genuine Ryobi batteries and chargers are designed specifically for Ryobi tools, ensuring optimal performance and efficient charging.
Avoiding Overcharging and Undercharging
Overcharging or undercharging a battery can lead to performance issues and potentially damage the battery. Always follow the recommended charging times and instructions provided by Ryobi for your specific battery and charger models. Overcharging can shorten the battery’s lifespan, while undercharging may result in inadequate power during use. By adhering to the recommended charging guidelines, you can extend the longevity of your battery and maintain its performance.
Conclusion
Understanding the flashing red and green lights on the Ryobi Battery Charger is essential to ensure the optimal performance and longevity of your Ryobi tools. By familiarizing yourself with the different flashing patterns and following the correct troubleshooting steps, you can identify and resolve potential issues effectively. Regular maintenance and care for both the battery and the charger, along with proper usage and storage practices, are fundamental in preventing charging problems. Remember to always use genuine Ryobi batteries and chargers, avoid overcharging and undercharging, and seek professional assistance when necessary. By following these guidelines, you can enjoy reliable battery charging and uninterrupted productivity with your Ryobi power tools.